10 Easy DIY Pallet Wood Projects for Beginners
Transforming discarded wooden pallets into beautiful, functional pieces for your home is one of the most rewarding DIY adventures you can undertake. These DIY pallet wood projects are not only eco-friendly repurposing materials that might otherwise end up in landfills but they’re also incredibly budget-friendly. Most pallets can be sourced for free from local businesses, making them the perfect material for cost-conscious crafters.
The natural, rustic aesthetic of pallet wood brings warmth and character to any space. Whether you’re looking to create practical furniture pieces or decorative accents, these 10 beginner-friendly projects will help you discover the joy of working with this versatile material even if you’ve never picked up a hammer before.
Table of Contents
Finding and Preparing Pallet Wood
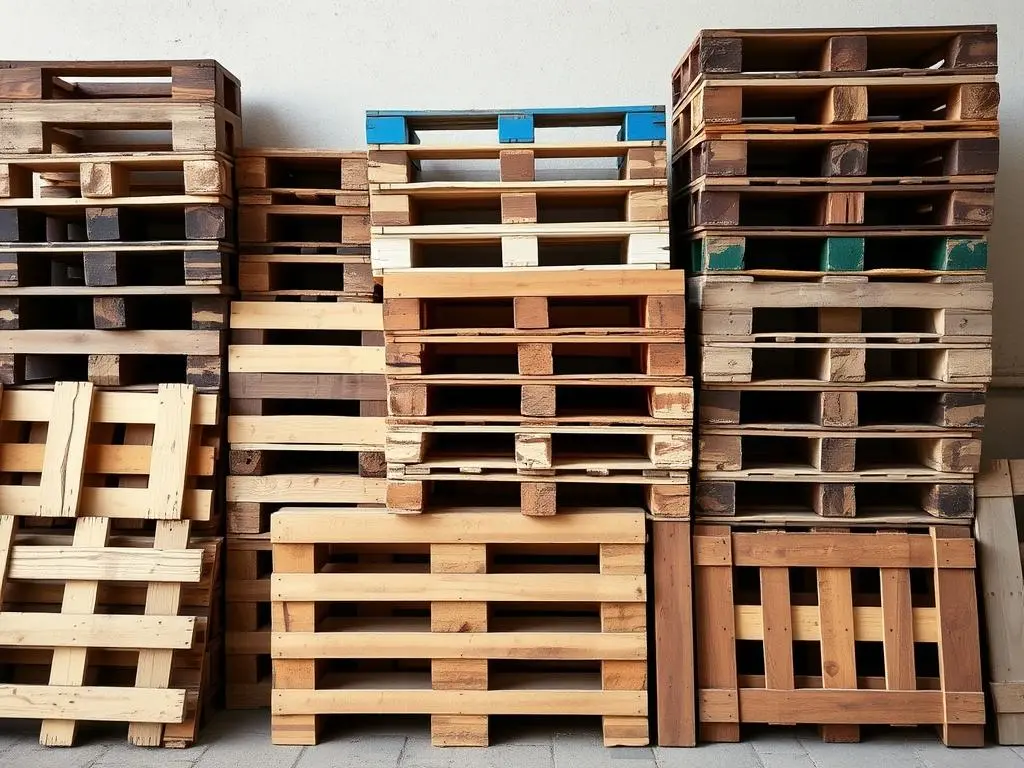
Before diving into your DIY pallet wood projects, you’ll need to source some quality pallets. Look around construction sites, grocery stores, garden centers, and home improvement stores many are happy to give away pallets rather than paying for disposal. Always ask permission before taking pallets from businesses.
Safety First: Pallet Selection
Not all pallets are safe for home projects. Avoid pallets marked with “MB” (Methyl Bromide) or “SF” (Sulfuryl Fluoride), which indicate chemical treatments. Instead, look for pallets stamped with “HT” (Heat Treated), which are safe for indoor use. Also avoid pallets with oil stains or those that transported food, as they may harbor bacteria.
Preparing Your Pallet Wood
Once you’ve found suitable pallets, proper preparation is essential:
- Wear heavy-duty gloves when handling raw pallets to avoid splinters
- Remove all nails and staples with a hammer or prybar
- Sand all surfaces thoroughly to remove splinters and rough edges
- Clean the wood with a mixture of vinegar and water to remove dirt
- Allow the wood to dry completely before starting your project
With your pallets prepped and ready, let’s explore 10 simple projects perfect for beginners!
1. Rustic Pallet Wood Wall Shelf
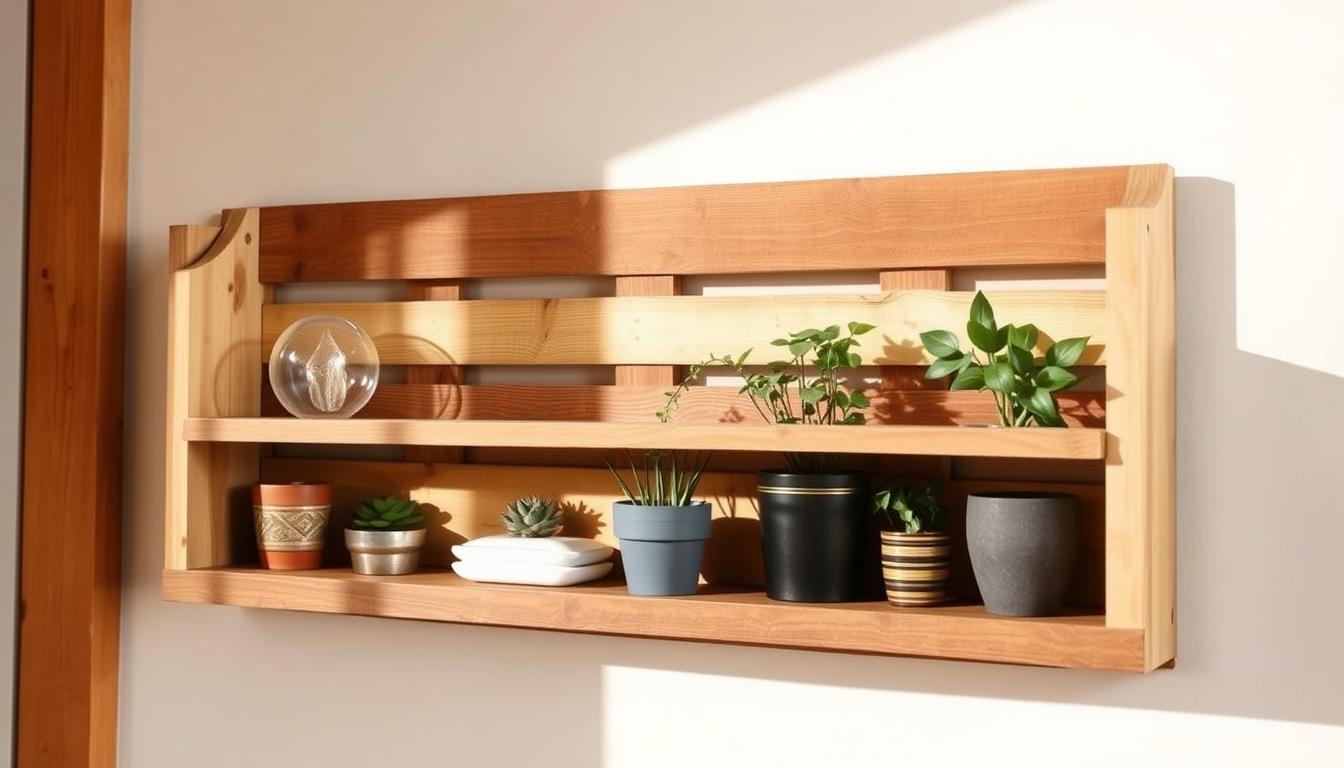
⭐ Beginner-Friendly
Project Details:
- Time Required: 2-3 hours
- Estimated Cost: $5-10 (brackets only)
- Tools Needed: Hammer, prybar, saw, sandpaper, drill
Materials:
- 1 pallet board (approximately 40″ long)
- 2-3 L-brackets
- Screws
- Wood stain or paint (optional)
Step-by-Step Instructions:
- Select and remove a straight, undamaged board from your pallet
- Sand all surfaces until smooth, paying special attention to edges
- Apply wood stain or paint if desired, and allow to dry completely
- Attach L-brackets to the wall at your desired height
- Mount the pallet board onto the brackets and secure with screws
This simple shelf is perfect for displaying small plants, photo frames, or decorative items. For a more rustic look, leave some of the nail holes visible rather than filling them.
2. Pallet Wood Coffee Table
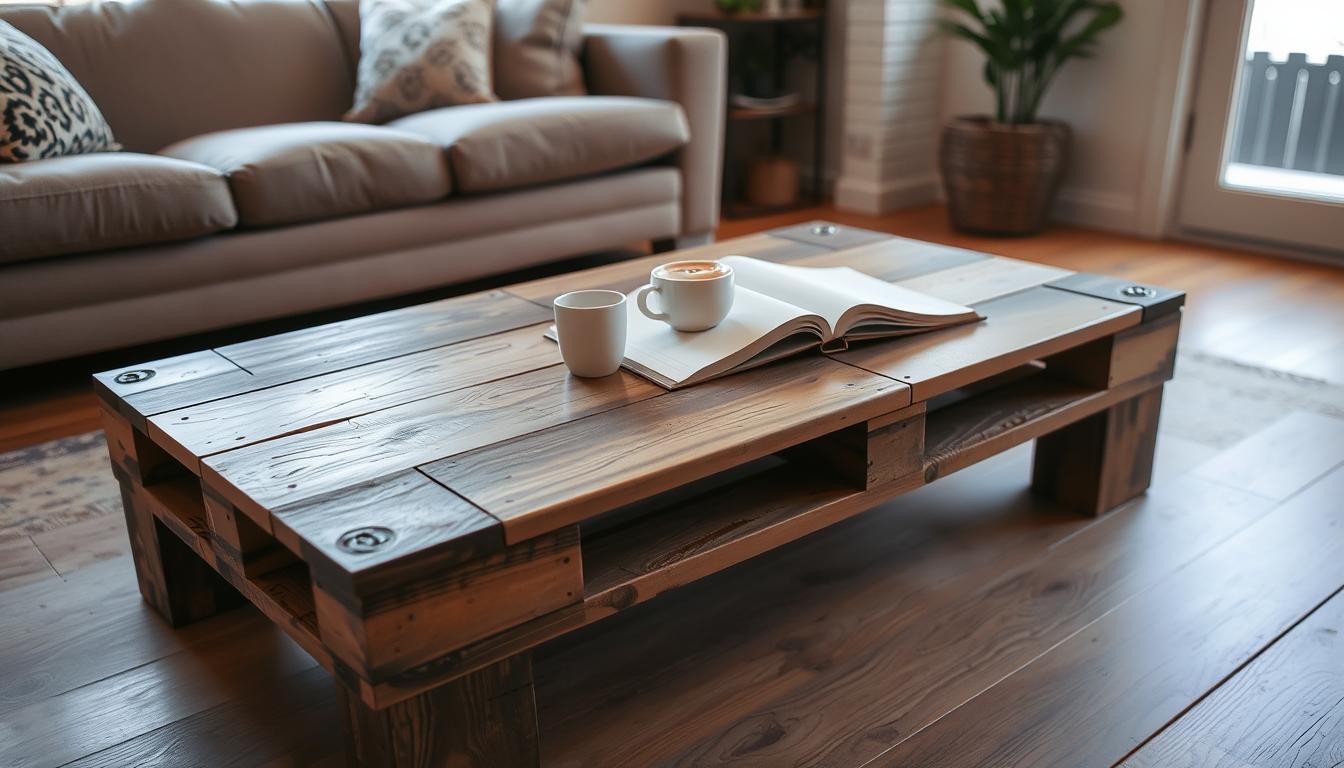
⭐ Beginner-Friendly
Project Details:
- Time Required: 4-5 hours
- Estimated Cost: $15-20 (wheels and screws)
- Tools Needed: Hammer, prybar, saw, sandpaper, drill, screwdriver
Materials:
- 1 complete pallet
- 4 caster wheels
- Wood screws
- Polyurethane sealant
- Sandpaper (medium and fine grit)
Step-by-Step Instructions:
- Clean the pallet thoroughly and sand all surfaces until smooth
- Fill any large gaps between boards with additional pallet wood if desired
- Apply 2-3 coats of polyurethane sealant, sanding lightly between coats
- Once dry, flip the pallet upside down and attach caster wheels to each corner
- Flip back over and your coffee table is ready to use!
“The pallet coffee table was my first woodworking project ever. It took one afternoon and has become the centerpiece of my living room. Everyone asks where I bought it!”
– Sarah, DIY enthusiast
3. Vertical Pallet Garden Planter
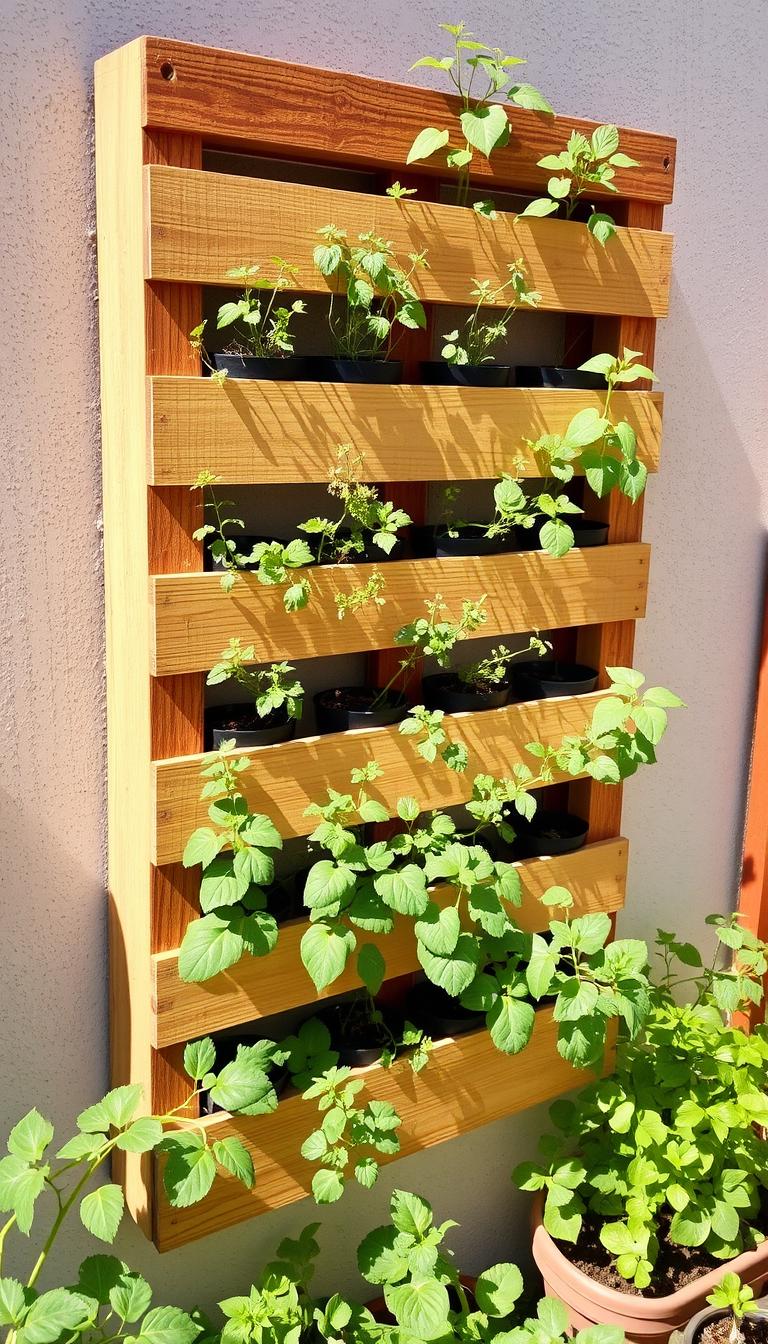
⭐ Beginner-Friendly
Project Details:
- Time Required: 3-4 hours
- Estimated Cost: $20-25 (landscape fabric, soil, plants)
- Tools Needed: Hammer, staple gun, sandpaper, saw
Materials:
- 1 complete pallet
- Landscape fabric
- Staples
- Potting soil
- Herb or flower plants
Step-by-Step Instructions:
- Sand the pallet to remove splinters and rough edges
- Cut landscape fabric to cover the back, bottom, and sides of the pallet
- Staple the fabric securely, creating pockets between the slats
- Fill the pockets with potting soil
- Plant herbs or flowers in each pocket and water thoroughly
Pro Tip: Let your vertical garden grow horizontally for 1-2 weeks before mounting it vertically. This gives plants time to establish their roots and prevents soil from falling out when you stand it up.
4. Simple Pallet Wood Picture Frame
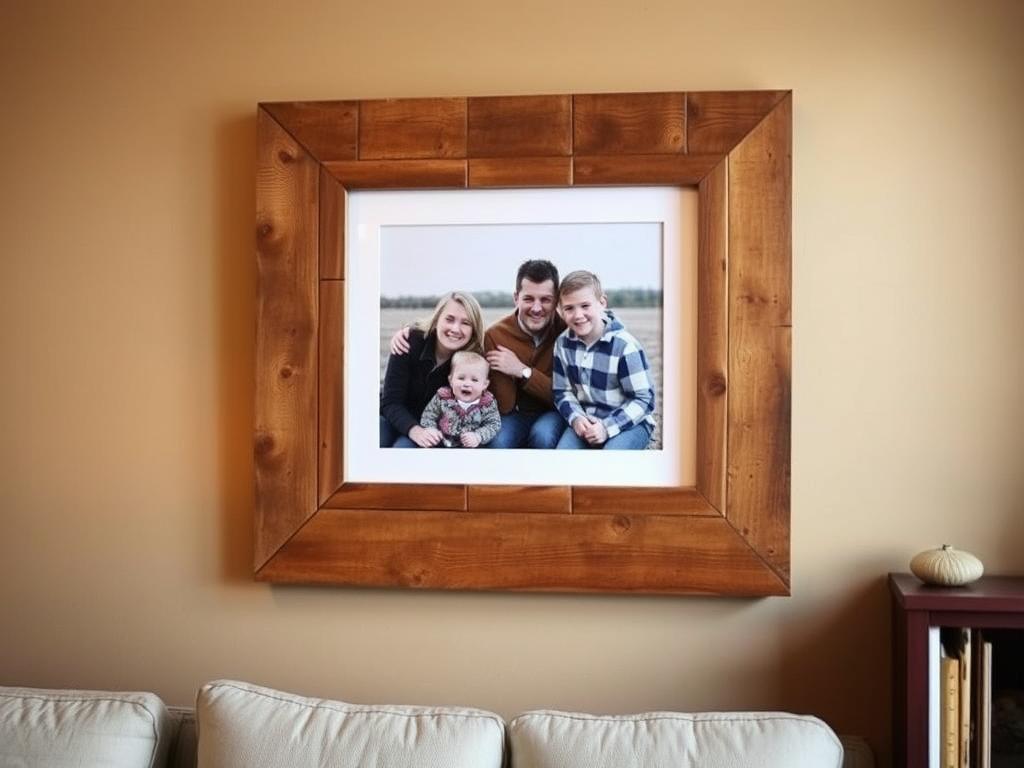
⭐ Beginner-Friendly
Project Details:
- Time Required: 1-2 hours
- Estimated Cost: $5 (hardware only)
- Tools Needed: Saw, sandpaper, hammer, measuring tape
Materials:
- Pallet wood boards
- Small nails or wood glue
- Picture hanging hardware
- Glass or plexiglass (optional)
Step-by-Step Instructions:
- Cut four pieces of pallet wood to your desired frame size
- Sand all pieces until smooth
- Assemble the frame by joining corners with wood glue or small nails
- Attach picture hanging hardware to the back
- Insert your photo (add glass or plexiglass if desired)
Create multiple frames in different sizes for a gallery wall effect. The natural variations in pallet wood create unique frames that add character to any photo display.
5. Pallet Wood Coat Rack
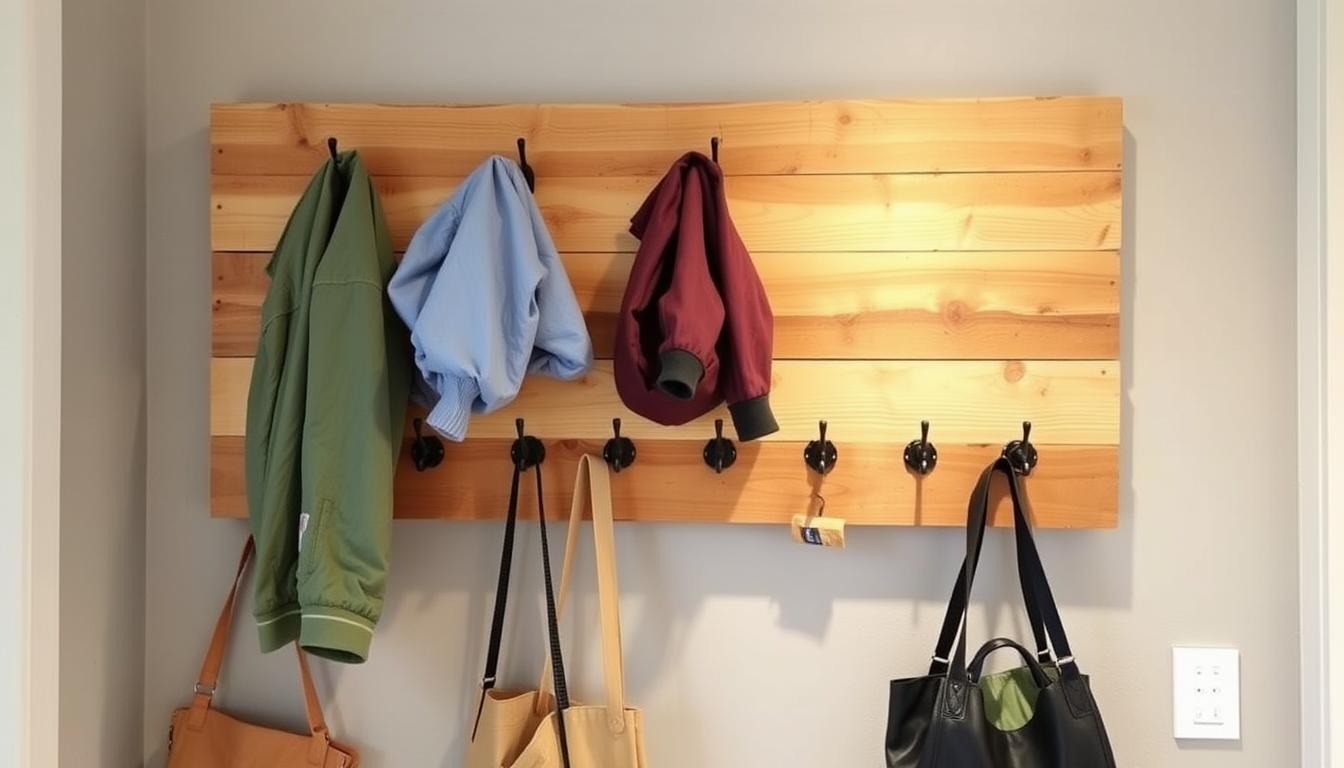
⭐ Beginner-Friendly
Project Details:
- Time Required: 2-3 hours
- Estimated Cost: $10-15 (hooks and mounting hardware)
- Tools Needed: Saw, drill, sandpaper, level
Materials:
- 1 pallet board (approximately 3-4 feet long)
- 4-6 coat hooks
- Wall mounting screws
- Wood stain or paint (optional)
Step-by-Step Instructions:
- Select and cut a pallet board to your desired length
- Sand all surfaces until smooth
- Apply stain or paint if desired and let dry completely
- Mark evenly spaced positions for hooks and pre-drill holes
- Attach hooks and mount the completed rack to your wall
“I made this coat rack in under two hours and it’s held up perfectly for over a year. The rustic look matches our farmhouse style perfectly.”
– Mike, DIY beginner
6. Pallet Wood Outdoor Bench
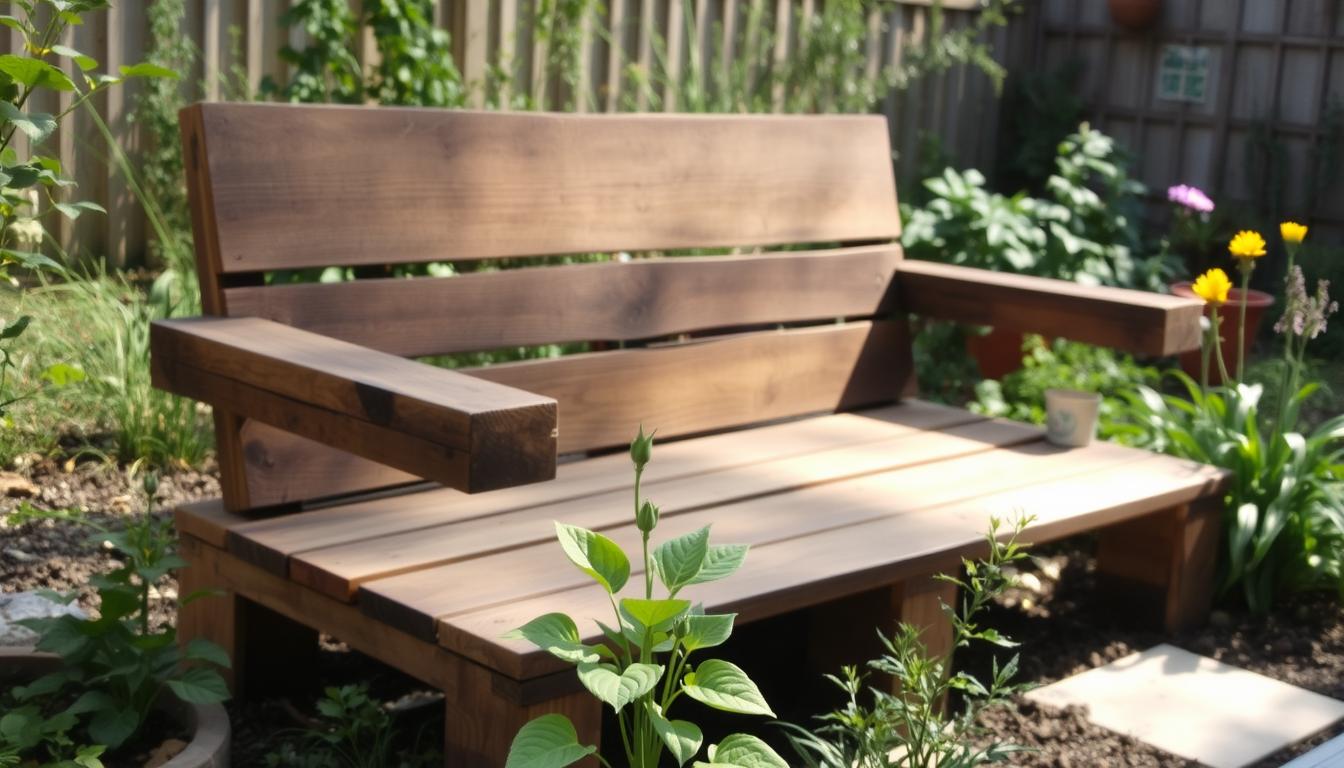
⭐ Beginner-Friendly
Project Details:
- Time Required: 5-6 hours
- Estimated Cost: $20-30 (screws and outdoor sealant)
- Tools Needed: Saw, drill, sandpaper, measuring tape
Materials:
- 2-3 pallets
- Wood screws
- Outdoor wood sealant
- Sandpaper (coarse and fine)
Step-by-Step Instructions:
- Disassemble pallets and select the best boards for your bench
- Cut boards to create the seat (approximately 4′ long) and legs
- Sand all pieces thoroughly
- Assemble the bench frame first, then attach the seat boards
- Apply 2-3 coats of outdoor sealant for weather protection
Comfort Tip: Add cushions to your bench for extra comfort. Choose outdoor fabric that can withstand the elements or bring cushions inside when not in use.
7. Pallet Wood Compost Bin
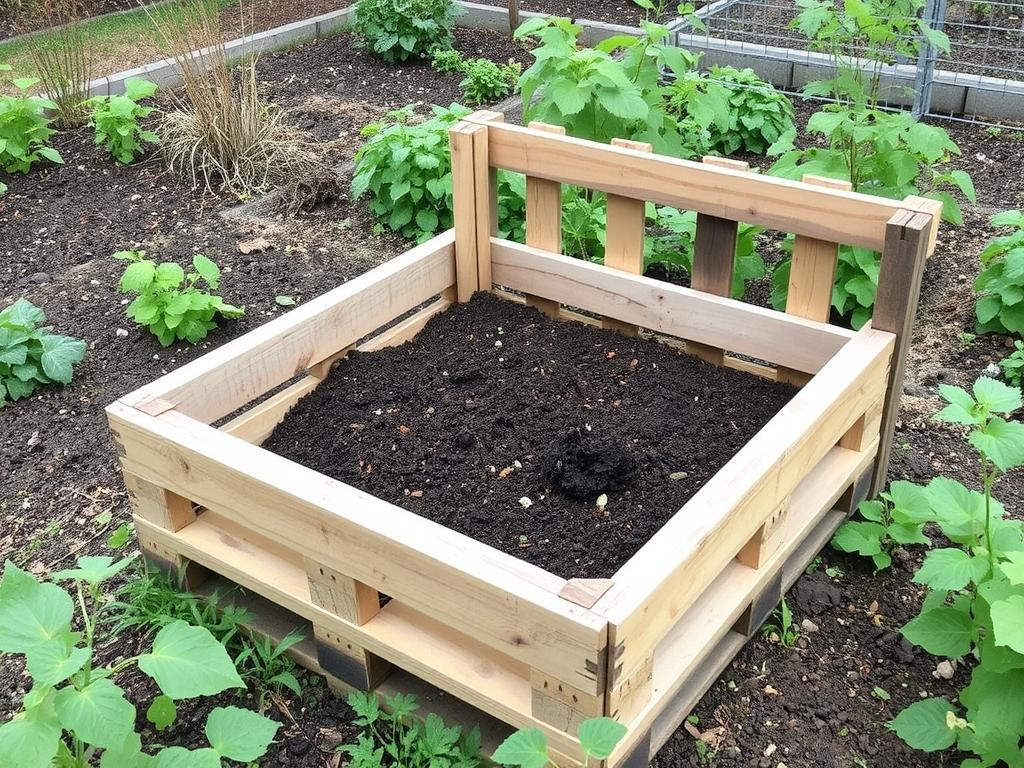
⭐ Beginner-Friendly
Project Details:
- Time Required: 2-3 hours
- Estimated Cost: $5 (zip ties or wire)
- Tools Needed: Hammer, wire cutters
Materials:
- 4 complete pallets
- Heavy-duty zip ties or wire
- Garden staples (optional, for securing to ground)
Step-by-Step Instructions:
- Choose a level spot in your garden for the compost bin
- Stand three pallets upright to form a U-shape
- Secure the corners together using zip ties or wire
- Use the fourth pallet as a removable front panel or lid
- Secure the bin to the ground with garden staples if needed
The spaces between pallet slats provide perfect airflow for your compost, helping organic matter break down more quickly. For faster composting, turn the pile regularly with a garden fork.
8. Pallet Wood Wall Art
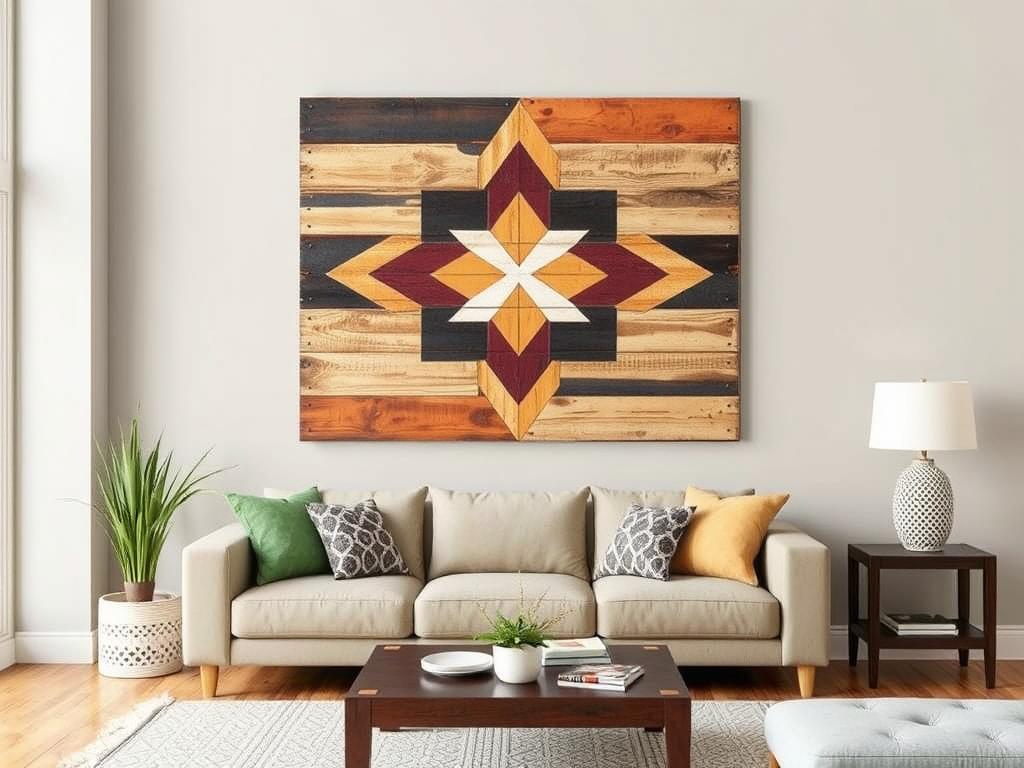
⭐ Beginner-Friendly
Project Details:
- Time Required: 3-4 hours
- Estimated Cost: $10-15 (paint and hanging hardware)
- Tools Needed: Saw, sandpaper, paintbrushes
Materials:
- Pallet boards
- Wood glue or small nails
- Acrylic paint or wood stain
- Picture hanging hardware
Step-by-Step Instructions:
- Cut pallet boards to equal lengths
- Sand all pieces until smooth
- Arrange boards side by side and secure together from the back
- Paint or stain with your desired design (geometric patterns work well)
- Attach hanging hardware and mount on your wall
“I created a mountain scene on my pallet wall art using just three colors of paint. It’s now the focal point of our living room and cost less than $15 to make.”
– Jamie, DIY enthusiast
9. Pallet Wood Shoe Rack

⭐ Beginner-Friendly
Project Details:
- Time Required: 3-4 hours
- Estimated Cost: $5-10 (screws and finishing materials)
- Tools Needed: Saw, drill, sandpaper, measuring tape
Materials:
- 1-2 pallets
- Wood screws
- Wood stain or paint (optional)
- Sandpaper (medium and fine grit)
Step-by-Step Instructions:
- Disassemble pallets and select straight, undamaged boards
- Cut boards to create the frame and shelves
- Sand all pieces thoroughly
- Assemble the frame first, then attach the shelves with screws
- Apply stain or paint if desired
Organization Tip: Add small dividers between shelves to create individual compartments for each pair of shoes, making it easier to keep your entryway organized.
10. Pallet Wood Desk Organizer
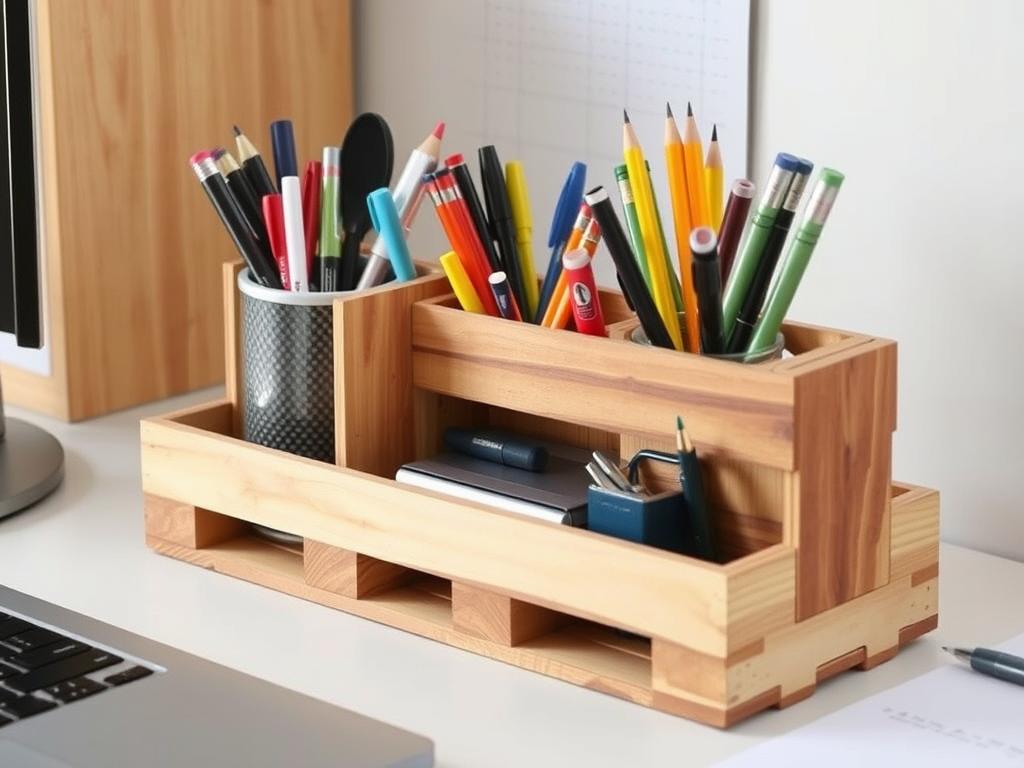
⭐ Beginner-Friendly
Project Details:
- Time Required: 2-3 hours
- Estimated Cost: $5 (nails and finishing materials)
- Tools Needed: Small saw, sandpaper, hammer, measuring tape
Materials:
- Small pallet pieces
- Small nails or wood glue
- Sandpaper (fine grit)
- Wood stain or paint (optional)
Step-by-Step Instructions:
- Cut small pieces of pallet wood for the base and dividers
- Sand all pieces until very smooth
- Assemble the base first, then attach dividers with glue or small nails
- Create compartments of different sizes for various office supplies
- Apply a clear finish to protect the wood and prevent splinters
This small project is perfect for using up leftover pallet pieces from your larger projects. It makes a great gift and helps keep your workspace tidy and organized.
Safety Tips for Working with Pallet Wood
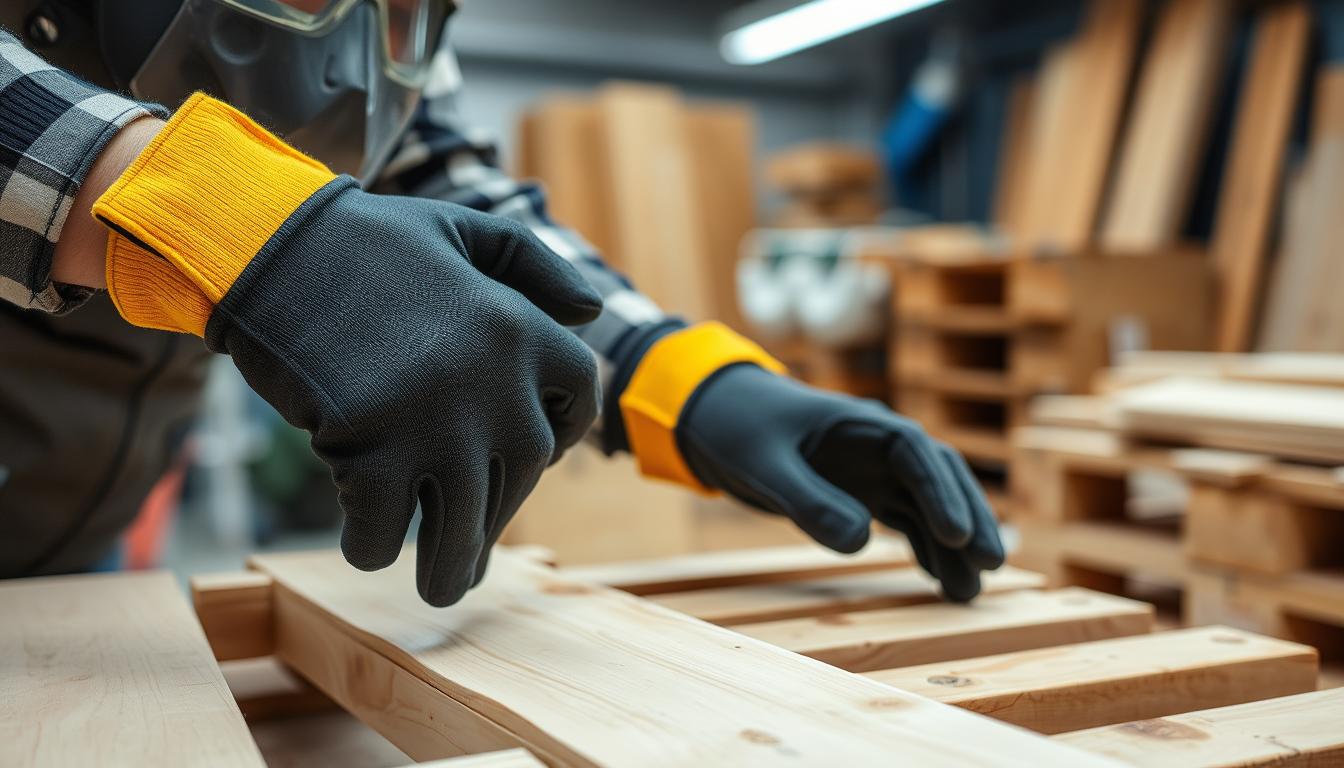
Essential Safety Gear
- Heavy-duty work gloves to prevent splinters
- Safety goggles to protect eyes from dust and debris
- Dust mask when sanding or cutting
- Ear protection when using power tools
Pallet Selection Safety
- Check for chemical treatment stamps (avoid MB/SF)
- Inspect for mold, mildew, or strange odors
- Avoid pallets with oil stains or unknown substances
- Look for the HT (heat-treated) stamp for safest options
Important Safety Reminder
Always work in a well-ventilated area when sanding pallet wood or applying finishes. The dust from unknown wood sources can cause respiratory irritation, and fumes from finishes can be harmful if inhaled in concentrated amounts.
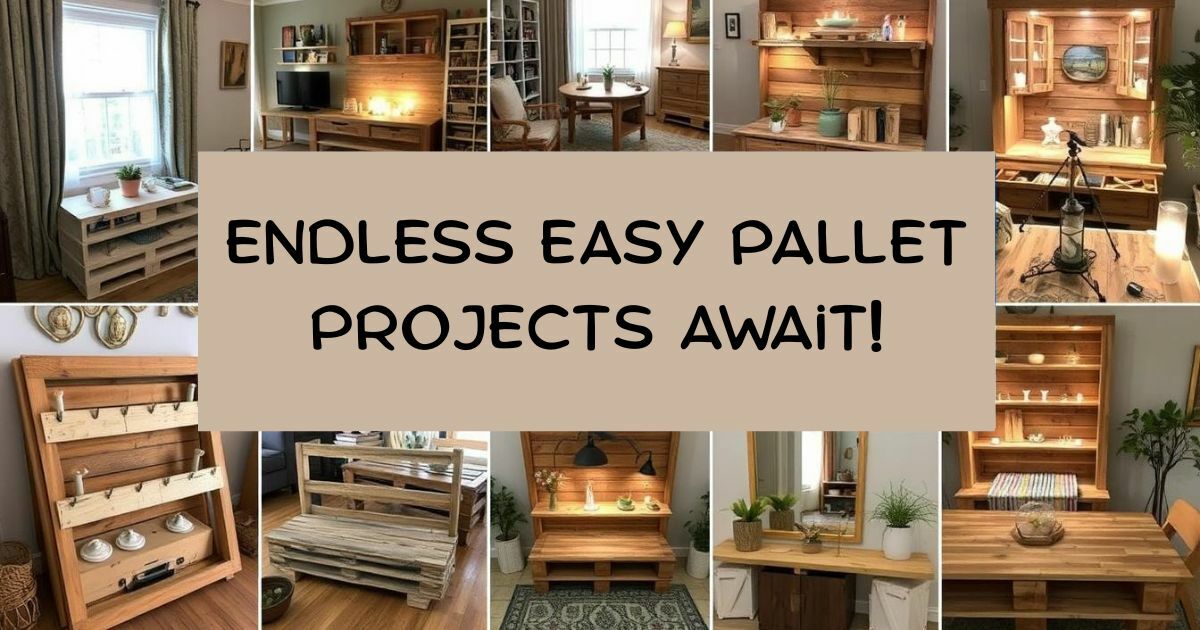
Start Your Pallet Wood Journey Today
These 10 DIY pallet wood projects are just the beginning of what you can create with this versatile, eco-friendly material. From simple wall art to functional furniture, the possibilities are endless and the satisfaction of creating something beautiful from reclaimed materials is unmatched.
Remember to start with smaller projects to build your confidence and skills before tackling larger pieces. Each project you complete will teach you new techniques and give you more experience working with this unique material.
We’d love to see your DIY pallet wood projects! Share your creations on social media with the hashtag #PalletWoodDIY or tag us in your photos. Your projects might inspire others to try their hand at upcycling this wonderful resource.
How long will pallet wood furniture last?
With proper preparation and finishing, indoor pallet furniture can last 5-10 years or more. Outdoor pieces should be sealed with weather-resistant finishes and may need resealing every 1-2 years depending on exposure to elements.
What tools are absolutely essential for pallet projects?
At minimum, you’ll need a hammer, prybar, sandpaper, and measuring tape. A basic handsaw will also be helpful. While power tools like drills and electric sanders make the work easier, they aren’t strictly necessary for beginner projects.
Can I paint pallet wood?
Yes! Pallet wood takes paint well, but requires thorough sanding and often a primer coat first. For best results, clean the wood thoroughly, sand until smooth, apply primer, and then add 2-3 coats of your chosen paint.